
How to create and WiFi Access Point based on a Raspberry Pi 3. There are many reasons why you might create an WiFi access point with Raspberry. Even the build in Raspberry components might not be the most reliable setup running an access point permanently for many clients.
But running a guest wifi or having a separated tinker network is a good example of a handy use. There are lot of examples out there. But I never found a fully working example.
The goal is to create an access point which is serving a new wifi network and share an internet connection from LAN. So the raspberry pi should be connected via ethernet to your internet router.
I am using a Raspberry Pi 3 B model running the latest Raspian Buster image (2019-09-26, download here: https://www.raspberrypi.org/downloads/raspbian/) without recommended software package.
I assume you have your Raspberry Pi modul up and running and have access over SSH.
1. First install latest updates
sudo apt update
sudo apt upgrade -y
2. Install RaspAP software package for raspbian access point.
wget -q https://git.io/voEUQ -O /tmp/raspap && bash /tmp/raspap3. During the installation you will be asked several times for your confirmation. You could confirm all questions with „y“ and complete the installation.
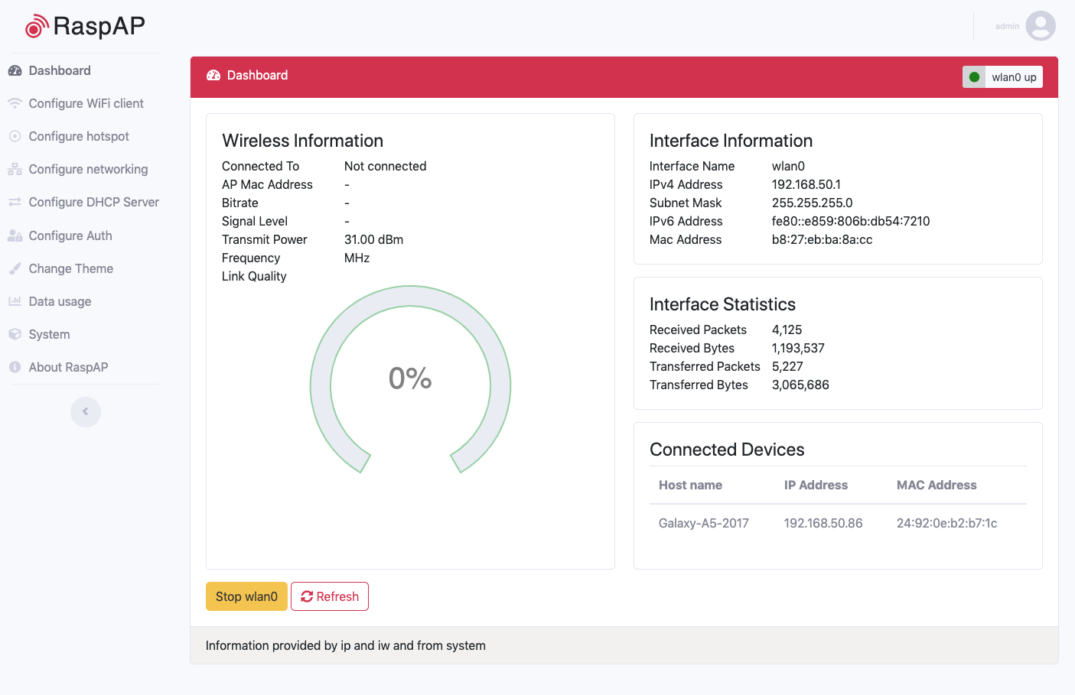
After the installation was completed RaspAP is running as a webservices on the raspberry pi. By default is is server over port 80. So just open the IP address of your raspberry within your web browser. The webgui will appear. You need to log into the admin interface. Username is by default „admin“. The default password is „secret“. You could change this via webgui later.
Although the software is called RaspAP it doesn’t work completely alone and you have to make some manual changes.
4. Set a manual fixed IP address for the wlan0 interface. Edit this as follows:
sudo nano /etc/dhcpcd.confAdd the following lines:
interface wlan0
static ip_address=192.168.50.1/24
Restart the DHCP service
sudo systemctl restart dhcpcd5. To make over devices have internet access we need to allow the forwarding. Open the and edit the following file
sudo nano /etc/sysctl.confAdd the following line
net.ipv4.ip_forward=1Execute the following commands to configure the Masquerading permanent:
sudo iptables -t nat -A POSTROUTING -j MASQUERADE
sudo apt install iptables-persistent
The last command will execute an installer. Please just confirm all requests with „Yes“.
sudo iptables -F
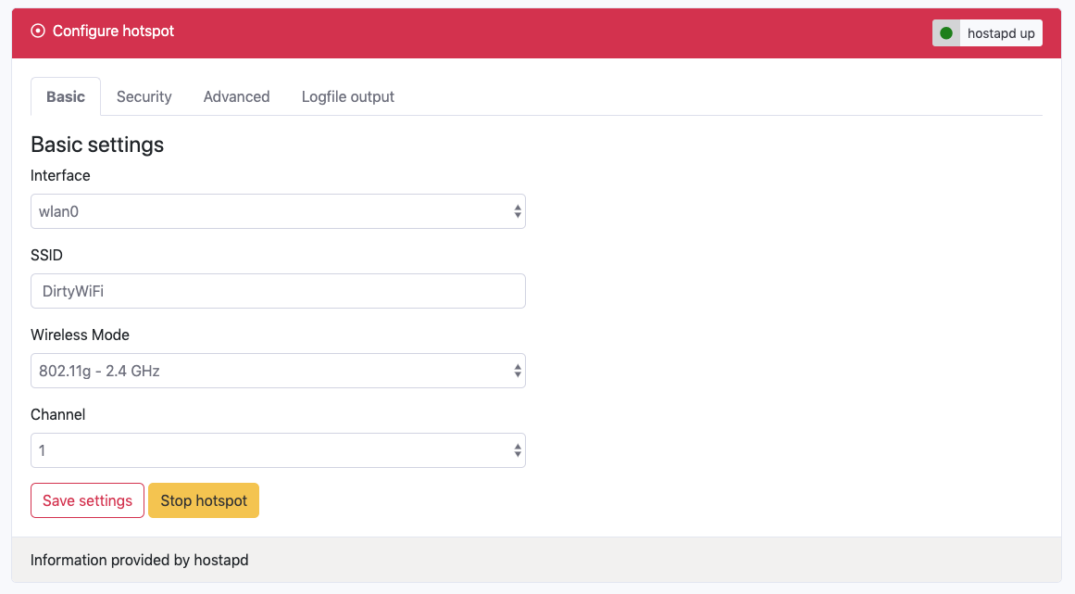
sudo sh -c "iptables-save > /etc/iptables/rules.v4"6. Finally go into the RaspAP web interface to configure the RaspAP. Go to „Configure hotspot“ to do the basic WiFi settings. Update the „interface“ to „wlan0“. Opional you could set a new SSID name, the name of your new WiFi. Within the next tab „security“ you should set a new WiFi password. Click on „Save settings“ before switch to the next page.
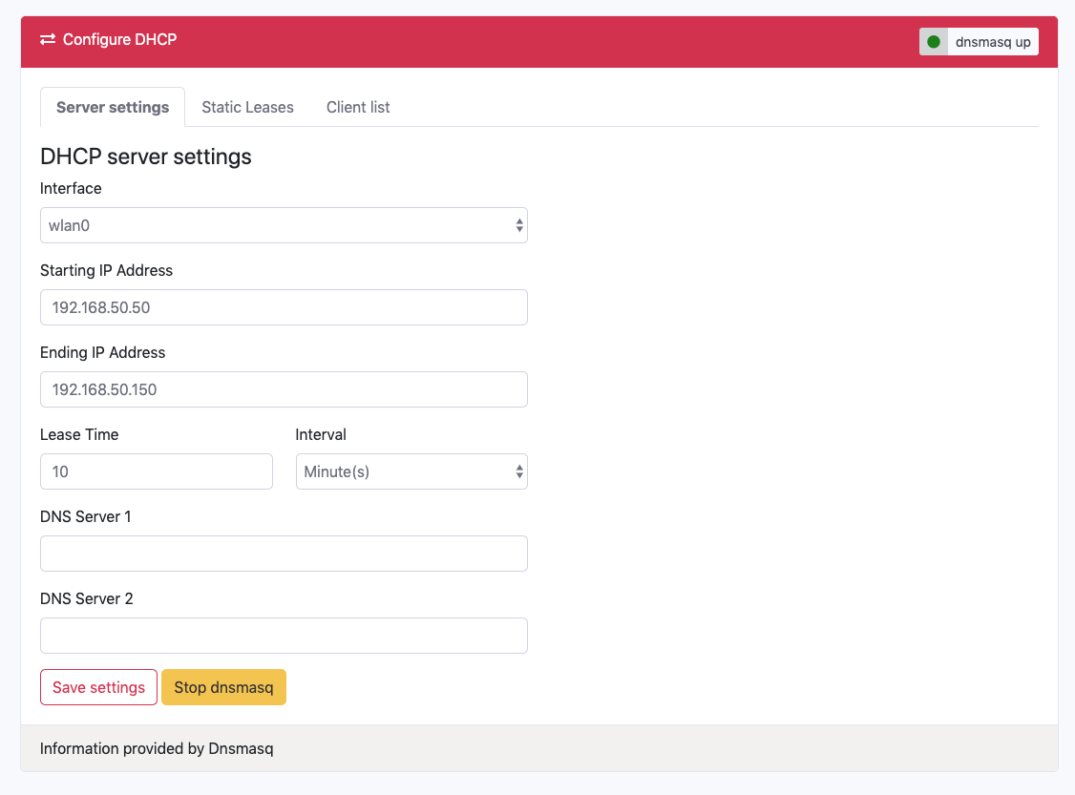
Next is the configuration of „Configure DHCP Server“. You need to configure the DHCP settings to manage which IP addresses will be used by the connected devices.
Select the interface to be „wlan0“. You could set an IP range start and end if your devices should only get an subset of IPs.
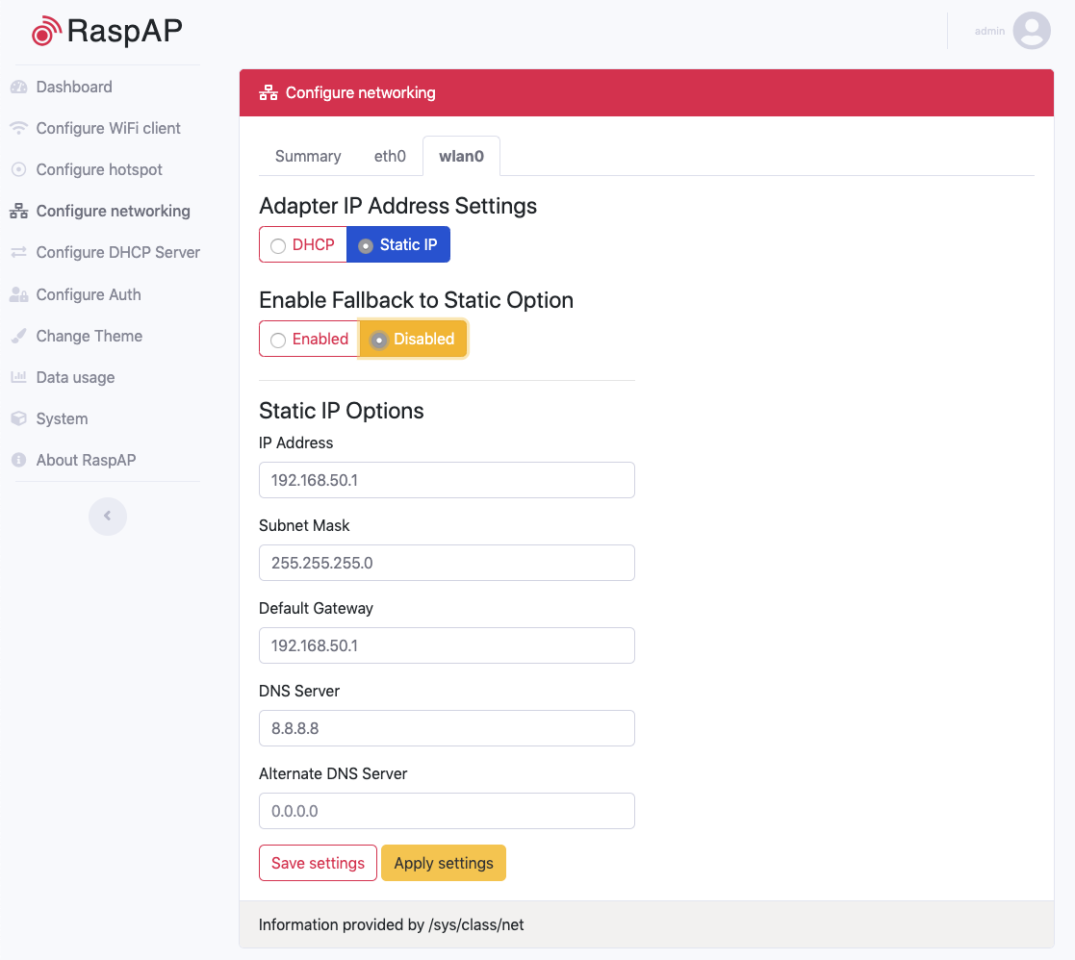
The last step is to update the network configuration. Go into „Configure networking“. Select the „wlan0“ tab to change the wifi configuration. Select „StaticIP“ and disable the fallback option.
Now enter the same IP address you set in the begging of the configuration. Here 192.168.50.1 – see example above. This IP is also used for the „Default Gateway“. You could also enter a „DNS Server“. You could use „8.8.8.8“ for using Google DNS server.
7. Finally reboot your raspberry pi and enjoy your raspberry pi as wifi access point.
sudo rebootcheers,
Sebastian
Dear Sebastian,
thank you for the easy description. Unfortunatly after all there is no conection to the internet.
After restart the AP I found in the GUI under „static IP“ Subnet mask NaN.NaN.NaN.NaN.
Opening /etc/dhcpcd.conf I see that the GUI changed static ip_address=192.168.50.1/24 to static ip_address=192.168.50.1/INF and added static routers=192.168.50.1 as well as static domain_name_seervers=8.8.8.8. The missing/ wrong Subnet Mask will be the problem.
Any advice?
Hi, thank you for the tutorial, works great. One question though:
After connecting a wifi device, is there any way to ssh into the rpi from the device. I tried with the gateway IP, as well as the rpis ip, but it always times out. Any ideas if that is possible?