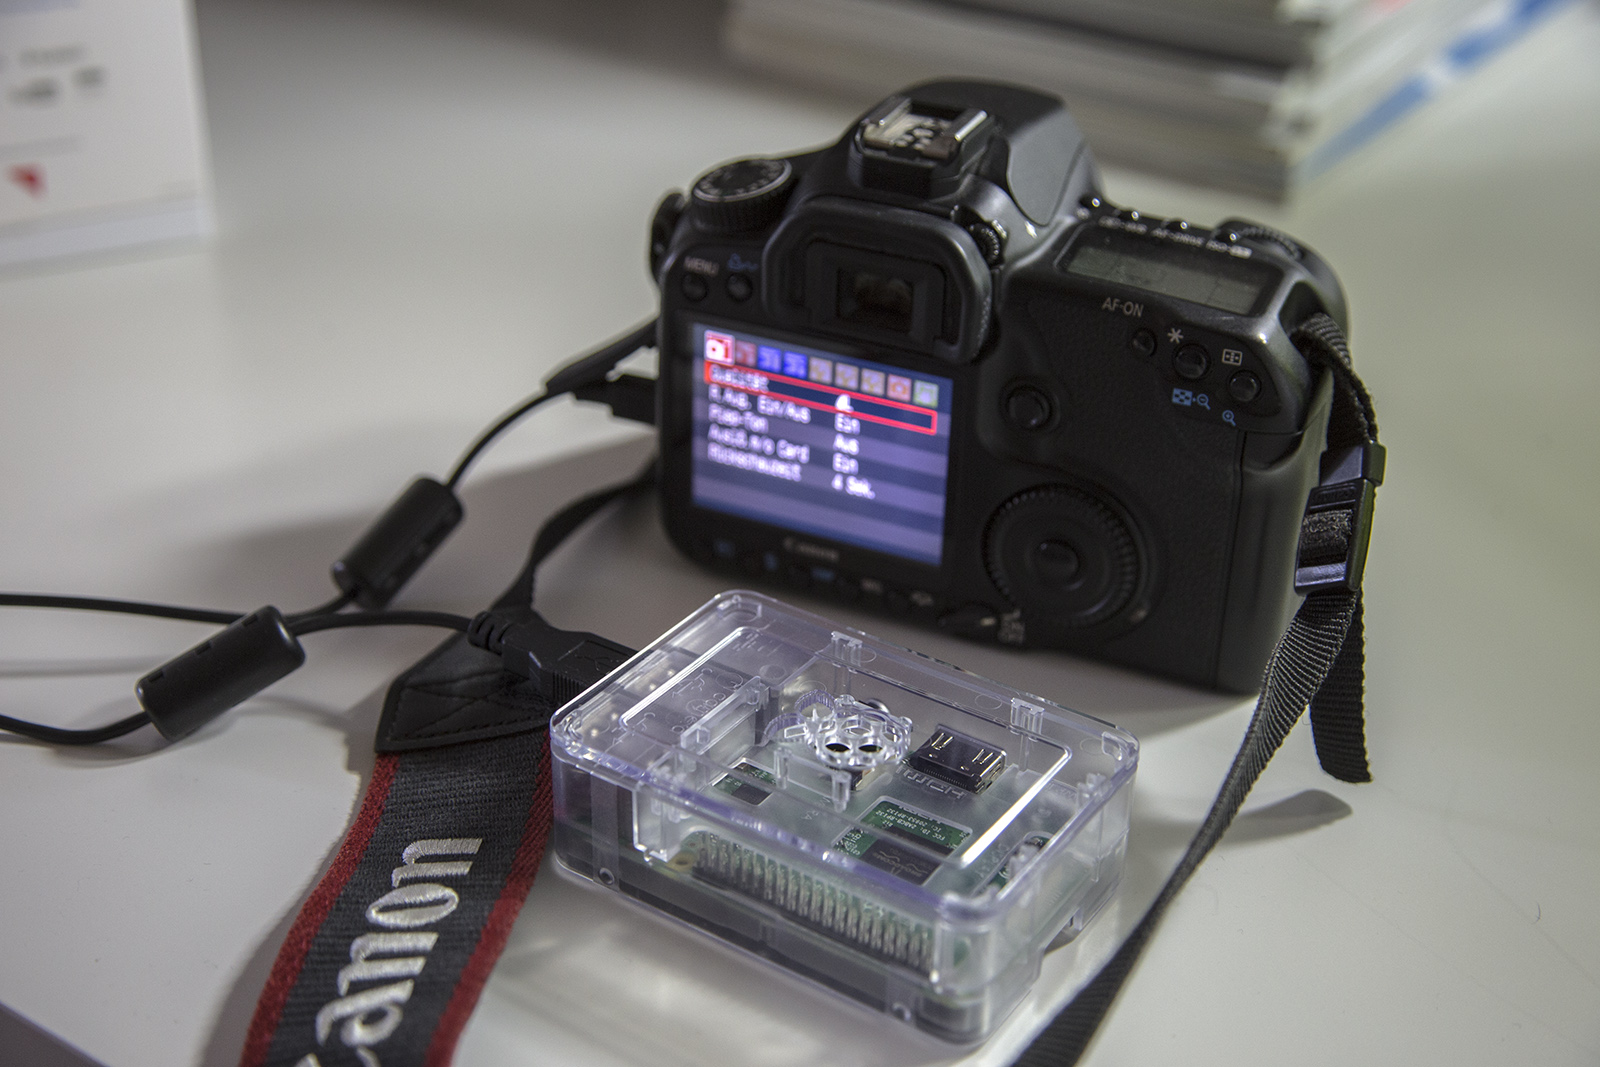
I totally love to work with the Raspberry Pi as everywhere computer. There are so many accessories available making it a great platform to experiment with. If you work with photos the standard raspberry pi camera is a well-known and stable tool. At least in most cases. The image quality is of course not that convincing, especially if you compare it to a DSLR or compact camera.
But lucky us we are not the first who have this problem. The solution is called gphoto2. It is a small command line tool which allows you to control DSLR cameras over USB connection. Here you find a list of supported cameras.
The Canon EOS 40D has a Mini-USB port. So you just need to plugin the Mini-USB into the camera and connect it to the USB port of your raspberry pi. That’s all.
But first, we have to prepare the raspberry pi. As for every software installation please bring your raspberry pi up to date:
sudo apt-get update
Now we need some further tools for the USB connection , if they are not already installed:
sudo apt-get install libltdl-dev libusb-dev libexif-dev libpopt-dev
And finally we install the gphoto2 tools:
sudo apt-get install gphoto2
For most DSRL cameras this should already be enough. If you have some trouble and the camera is not reacting on your commands this might help (for Canon EOS 40D you will definetly have to do this steps). Just type in the following commands:
sudo rm /usr/share/dbus-1/services/org.gtk.Private.GPhoto2VolumeMonitor.service

sudo rm /usr/share/gvfs/mounts/gphoto2.mount

sudo rm /usr/share/gvfs/remote-volume-monitors/gphoto2.monitor

sudo rm /usr/lib/gvfs/gvfs-gphoto2-volume-monitor
Restart the camera and the raspberry pi. Now you should be able to use the gphoto2 commands.
If everything went right, the following command should give you a list of detected camera and should show up your model:
gphoto2 --auto-detect
pi@raspberry:~$ gphoto2 --auto-detect
Model                          Port
----------------------------------------------------------
Canon EOS 40D                  usb:
pi@raspberry:~$
If you use the following command the camera will take a photo and the image will be downloaded from the camera to your raspberry pi immediately:
gphoto2 --capture-image-and-download
Now you could do that every you want with your taken images.
cheers.
Sebastian
Hallo,
ich bin linux Neuling, ich kämpfe seit Tagen mit gphoto2 und meiner Canon EOS 1100D. Ich habe die Kamera an einem astro-Remote-System und arbeite am Raspbeery Pi 3 remotely.
Nach der Insatllation von gphoto2 wurde die Kamera gelegentlich erkannt und ich konnte sie auch einmal auslösen dabei war ich nicht per remote auf dem Raspberry), wobei ich die Prozesse gvfs-ghoto2 händsch gekillt habe. Nach dem ausschalten der Kamera konnte ich sieremotely mit lsusb manchmal sehen. Bei zweiten Aufruf von lsusb war sie unsichtbar. Eine angeschlossene WebCam ist immer unproblematsich sichtbar.
Dann bin ich ihrer Anleitung gefolgt, seitem ist die Canon nicht mehr sichtbar.
Was kann ich tun?
Liegt es daran, dass ich den raspberry remotely betreibe? Manchnal hatte ich diesen Eindruck. Um direkt am Raspberry arbeiten zu können, müsste ich ihn aufwändig ausbauen.
Für eine zetnahe Antwort wäre ich ihnen sehr dankbar.
Gruß, Lienhard Pagel
Hallo Lienhard,
leider habe ich seid dem Post nicht mehr mit ghoto2 gearbeitet und kann aktuell leider nicht helfen.
cheers,
Sebastian
Hi . Thank you for this excellent instruction . I would love if you could write a similar instruction on how to send photos from the Pi to a cloud storage using WiFi ( For example a mobile 4G modem ) for when my camera is in a remote location . Many thanks , Dermot Quinn , Dublin , Ireland.